Friday, April 17, 2020

How to Record Zoom Meetings with RecMaster

Great moments should be recorded for further usage or taste. Then how to record Zoom meeting or call on computer? Briefly you have two ways to go: use the built-in recording feature or leverage a third-party Zoom recorder. You may ask which is more suitable for you, well, it really depends. Please go through the following content before you make the final wise decision.

 Limitations of Zoom App Recording

Everything on the planet has its pros and cons, therefore when you take Zoom recording with its bundled feature, there are something you’d better make clear in advance.
  1. Since any meeting includes two characters, host and attendee, the host is surely born with more powers to decide whether to allow the meeting recording, whether to give each single attendee the privilege to record, and the capability to auto-record. In other words, the participants may be limited to create Zoom recording.
  2. For local recording, only PC users could enjoy the benefit, which means if you are using Zoom on mobile, you are forced to turn to cloud recording or any standalone recording app. When conducting local recording on desktop, you’d better keep the file location on local drive but not to a cloud syncing folder from external places, because some converting or saving error may appear during cloud syncing.
  3. For paid users, Zoom enables cloud recording automatically, so take a note on the available cloud storage. If the recorded file exceeds the maximum size, only after you pay for the piece of video or audio can you obtain and watch it.
  4. Another risk of Zoom recording is that if the meeting is suddenly ended for internet or whatever reason, the recording on the going will be corrupted and unable to recovery.

Zoom App Recording vs Third-Party Recording, What’ s the Difference?

They two recording methods both have their own strengths and weaknesses. Below are some typical differences.It’s undisputable that Zoom is an excellent teleconferencing service which is stocked with handy and optional recording functionality. But as the information that’s moved from official sites hints, recording or file converting failure is still possible for local recording. To guarantee a more stable recording with no fall, you are suggested to invest an advanced subscriber with sufficient cloud space or employ a reliable Zoom screen recorder.

Zoom’s Built-in Recorder
Third-party Zoom Meeting Recorder
Recording Permission
The hosts are free to record while the attendees may be prohibited to record.
Anyone joining the meeting could take a screencast.
Recording Modes
Free users can only enjoy local recording while licensed people are offered both local and cloud recording modes.
Only supports local recording
Recording Length
No limit for local recording while it’s restricted by the cloud storage.
No time limit.
Recording Formats
MP4 for video recording, M4A for audio recording and M3U for playlist playback.
More available video and audio formats, which vary from programs.
Recording Quality
All files are produced with fixed quality level.
More flexible quality control.
Recording Stability
Any unexpected shutting down of meeting or file conversion will result in a corrupted or non-recoverable recording.
What’s going on in the Zoom app will not affect the software recording.
Others
Able to record audio files for any participants who speaks separately and has the recording transcribed; Public behavior that everyone knows you’re recording;
Usually has features of annotating, editing, schedule recording and one-click sharing; Recording secretly.

How to Record Zoom Meeting or Call with Third-party Recorder?

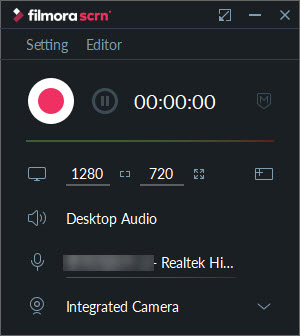
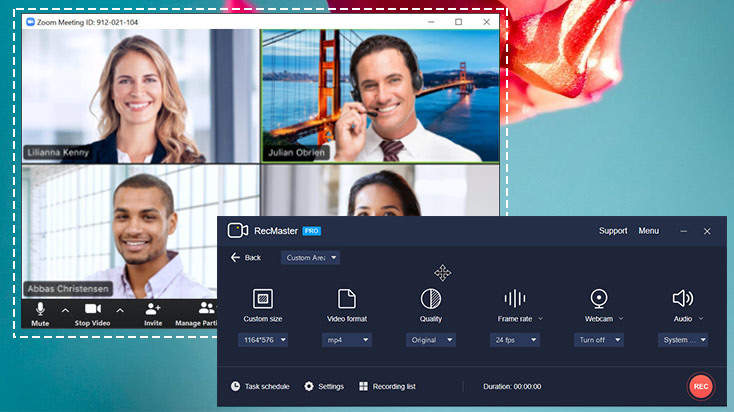
Generally, a dedicated screen recorder is capable of capturing whatever contents and behaviors on the desktop, system audio and microphone sound included. Set RecMaster – one of the easiest desktop screen recorders – for example, it’s able to perfectly record online meeting, video/voice call, and webinar from Zoom, Google Hangouts, Skype or so. Also, you are free to create video or audio recording according to the real situation. Have a glance at the simple tutorial below:
Step 1. Free download and install the recorder on to your computer.

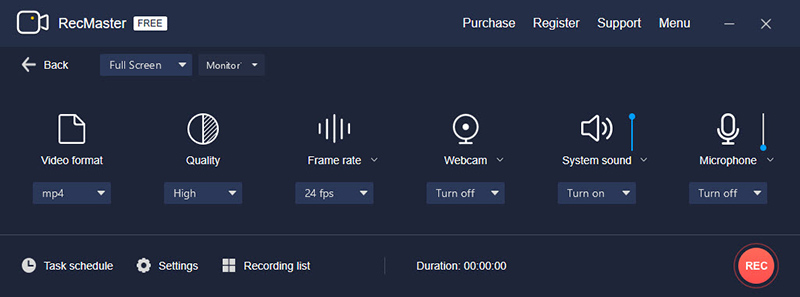
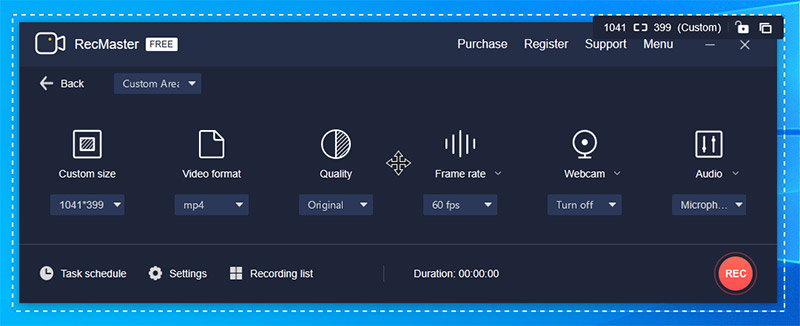
Step 2. Launch RecMaster and choose a proper recording mode to move on: Full Screen is recommended for capture full-screen meeting, Custom Area is to meet the requirements on windowed or a fixed area recording, and Audio Only is designed for shooting Zoom meeting or call audio purely.
How to Record Zoom Meeting with RecMaster
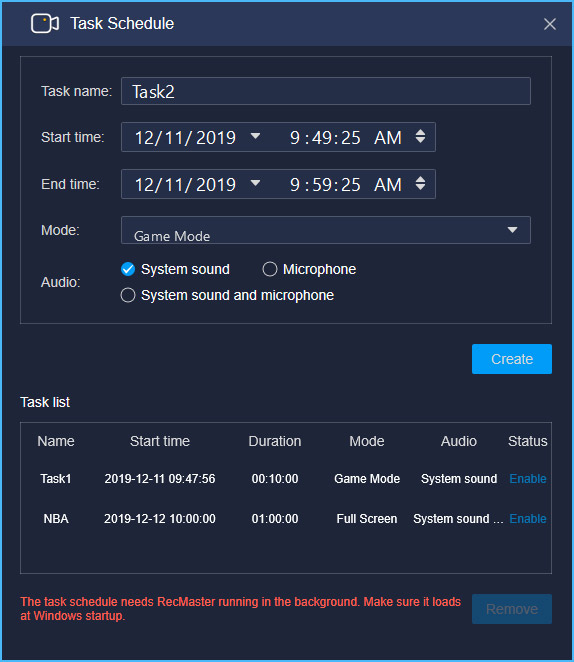
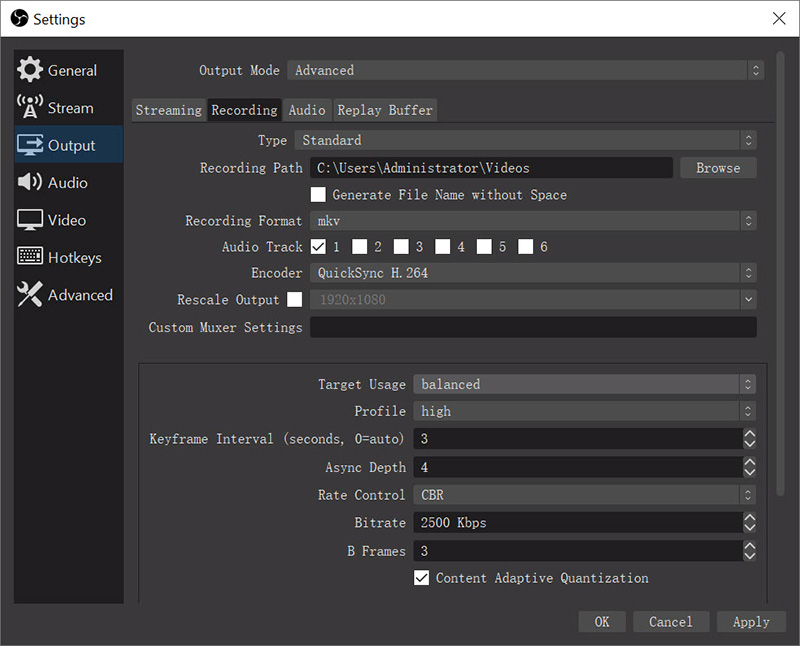
Step 3. Set file format, quality and turn on the microphone. If you will hold or attend a scheduled meeting or prefer a scheduled recording, click Task Schedule to define the time and enable it.
Step 4. Click REC button or press Alt+1 hotkeys to start to record Zoom meeting/call once it’s ready. For scheduling recording, you just keep RecMaster running in the background and leave it alone. It will automate the capture by itself.
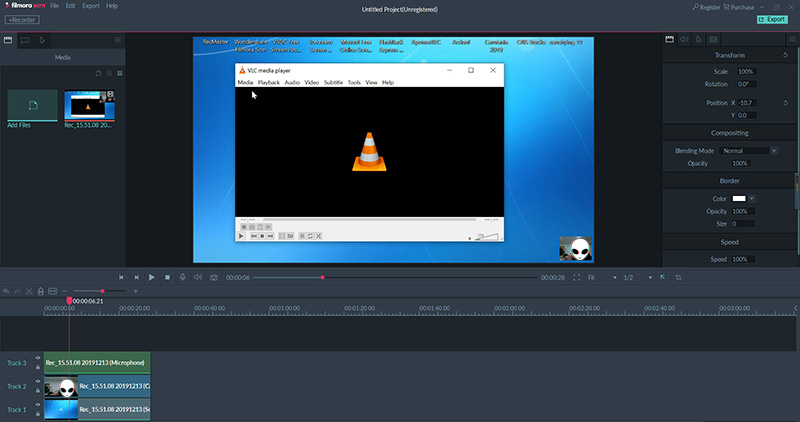
Step 5. When the recording is over, you are empowered to do easy edits and sharing it to YouTube directly.

Wednesday, April 8, 2020

Possible Fixes on OBS Studio Black Screen Error

If you are encountering a black screen error when capturing screen on Windows PC, try the following possible solutions to work this problem out immediately.

Fix 1 – Restart OBS Studio and Computer
As a general solution, restarting software or rebooting the machine can resolve many unusual behaviors. So don’t take it as a flippant one. Just do it with patient. Also, you can check and update OBS if there’s new software release. Totally depends on yourself.
For Windows user, if the problem still exists after that, do check whether the OBS bit version you installed is suitable for your Windows system. Don’t be silly to set up a 32-bit version OBS on your 64-bit PC or vice versa.

Fix 2 – Close Other Software, Especially the Screen Capture Software
In some few situations, it’s the application running in the background that affects OBS’s performance and this is the software conflict. Close the irrelevant programs completely with task bar, especially the one regarding screen recording or broadcasting.

Some OBS users still reported that the Game Mode, designed especially for optimized gaming or Game Bar capture performance on Windows 10, may cause black issue, so check and disable Game Mode if you have enabled it under Settings -> Gaming -> Game Mode.

Another Game-Mode-alike way that many computer geeks love to take advantage of for gaming speed-up is overlocking. Either CPU or GPU can be overlocked to get an increased clock rate of component if it doesn’t ship with locked multipliers. If you’ve allowed it on your computer, disable the overlocking to see if it works.

Fix 3 – Run OBS as Administrator or In Compatibility Mode

In case OBS Studio doesn’t have the right to do screen capture, run it as Administrator. If you’ve installed and placed it on the C:// drive, you’d better change its driver permission by right clicking and accessing Properties -> Security -> Edit, and enable Authenticated Users to have Full Control.

This operation grants users to have totally permission to utilize OBS. And as to black screen matter brought by software compatibility matter, it will disappear while you still right clicking OBS shortcut and click Properties -> Compatibility, and tick “Run this program in compatibility mode for:” other Windows version number say 8, 7 and such.

Fix 4 – Switch Capture Mode or  Method
If you can’t see the capture image in certain capture mode like Window or Game capture, alter the resource option to see if it works. And for Game Capture, make sure you are running game firstly and then add Game Capture in OBS Studio. Also, running the game at full screen, but not windowed or borderless if the Mode is “Capture any fullscreen application” on Game Capture Properties. Another option on this Properties panel – “SLI/Crossfire Capture Mode” could also help to maintain a regular capture basically when your computer has two (NVIDIA/AMD) graphic cards built in. (More fixes on OBS black screen on multi-GPU computer will be detailed later.)
For Window Capture, there are three capture method options on its properties now: Automatic, BitB1t (Windows 7 and up), and Windows Graphics Capture (Windows 10 1903 and up). You should pick the one according to your system condition.

Fix 5 – Change Graphics Settings
Following solution 4 which concludes some GPU-related operation on software, this one is mainly for settings on system. If your computer is running two GPUs or you’re doing screencasts on laptop, black screen is a usual case. That’s because due to certain system update or the system settings by nature, OBS Studio and the on-screen content you plan to grab (e.g video game and display) are running at different graphic card. Consequently, OBS Studio is unable to initiate the capture. At this time, you can alter the Graphics specifications to fix this issue. The steps are super easy:

● For Windows 10 1909 or later: Go to system Settings -> System -> Display, and click to open “Graphics settings”, where you should select “Classic app”, browse to where you have installed OBS (e.g D:\Program Files\obs-studio\bin\64bit\obs64.exe) and add the app into the list. After that, click “Options” of OBS Studio and alter the graphics preference of OBS Studio app form System default to “Power saving” or “High performance” manually. Power saving is recommended for display capture while High performance is for game capture or using NVENC encoder.

● For older Windows computer with NVIDIA card: Desktop or laptop, you need to enter into the Nvidia Control Panel and then navigate to Manage 3D settings -> Program Settings to add and select OBS Studio to customize. What comes next is to select “Integrated Graphics” for common desktop display capture or “High-performance NVIDIA processor” for game capture.

● For browser capture with black display: Browser rendering often takes much sources, therefore in order to improve the efficiency, browsers like Chrome and Firefox supports and will use hardware acceleration by default. Give it a try to disable browser’s hardware acceleration to settle the OBS black screen on Browser capture.
Yep, in this way, you can keep the recording content and OBS Studio running on the same GPU so that there’ll be no black screen error any more. Actually for recording gameplay on high-end computers, there are also many decent game recording software you can rely on.

Fix 6 - Reinstall OBS Studio
Reinstalling can also be done at the very beginning in case there are some unknown bugs of the existing setup.

Fix 7 – Try Best OBS Studio Alternative
If the display error always exist even after you've finished all of the possible troubleshooting methods, you can only turn to another screencast software. Below are some recommendations:
Open source software: CamStudio,  ShareX,  Ultra Screen Recorder, Virtualdub etc.
Free software: Ezvid, Fraps
Shareware: RecMaster, Bandicam, Movavi Screen Recorder

For more details and screenshots, please refer to the copyrighted post:

Monday, January 6, 2020

How to Record Live Stream from YouTube/FB/Twitch on Computer

Live-streaming is going big in recent years! From entertainment to social media platforms, the giants have joined into the contest of live streaming one after another. Especially in this year, they are playing all their cards in the war of talents. For instance, in last month (November, 2019), Facebook and YouTube cut deal with a major pre-Twitch game streamer respectively. With over 1 and 2 million followers on Twitch severally, they two influential gamers – Jeremy “DisguisedToast” Wang and Jack “CouRage” Dunlop will certainly bring about a lot of benefits to Facebook and YouTube live channel in the future, among which traffic is the most visible one.
Record Live Stream on Windows PC
Online users love live streaming. Compared to regular non-live media formats like video-on-demand and vlogs, live streaming videos, by virtue of the born magic power, attract audiences to spend more time and interact more with it. However, since live streaming content only lives once, and most of them are unavailable to download or the full movie may be deleted according to author or platform’s willing, when you want keep it for further viewing or personal usage, you will have to learn how to record live stream video or audio by utilizing a live stream screen recorder.
Generally, there are two methods to capture live streaming video: one is using live stream screen recording software to capture directly on computer machine, and the other one is to transmit live video signal to third-party recording tool (like DVD recorder or VCR) off computer via a video-audio cable for recording. Here in this article, we will show you the former easier method in detail.
line

How to Record Live Stream Content on Windows PC or Mac (Laptop Included)?

The most efficient way to do live streaming capture is to find a slick live stream screen recorder, the one that can record, encode and output a high quality file at one go. RecMaster is just one of such seasoned screen recording software. It not only supports record living streaming from any online sites like YouTube Live, Facebook Live, Periscope (web), Mixer, Twitch, YouNow, ESPN live and Vimeo live, but also gives you a flexible control on recording size, format, quality and audio. Now leave out those theoretical words, let’s see how RecMaster works below.
Step 1 – Download and Install RecMaster
Download RecMaster for Windows or Mac below and install it on your computer, be it a desktop PC or a portable laptop. After finishing the installation, launch the program.
free download RecMaster for Windows free download RecMaster for Mac
Step 2 – Set for Live Streaming Recording
RecMaster has several recording modes.
For live video capture, you can choose Full Screen or Custom Area mode according to your watching habits (full screen or windowed). The only difference between them is Full Screen grabs the whole computer screen while Custom Area empowers you to select the specific region to record manually.
For live audio capture, choose Audio Only capture mode to save any online audios into MP3 or WAV easily.
Five Modes of RecMaster Live Stream Recorder
When it comes to live streaming video capture, you are free to define output video format (to MP4/AVI/FLV), quality level (to Standard/High/Original), frame rate (to VFR/CFR, 20-60fps), adjust system sound volume, as well as whether or not to show your webcam or microphone sound. Some other settings like watermark or cursor effects are unnecessary if your goal is to do 1:1 capture.
RecMaster's Full Screen Live Stream Capture
[Task Schedule – A Recommended Feature You Shouldn’t Miss]
In case some sports/gaming/concert/awards living streaming events occur at an improper or say bad time, you’re suggested to take advantage of RecMaster’s Task schedule functionality. With it, you can create and enable any recording mission by setting a precise start and end time, choosing full screen or custom area recording mode, selecting what audio source to capture.
RecMaster Task Schedule Feature to Auto-record Future Live Stream
Do remember to run RecMaster in advance. If not, even you enable the live stream capture task, it won’t take go into operation. If you are not in front of computer near before the recording, you can auto-start the software by checking “Launch program at Windows startup” under Settings.
Step 3 – Start and End Recording
If you are recording the living streaming while watching before computer, tap the red button or use hotkeys (Alt+1/Alt+2) to start and end the screencasting when the broadcast begins and goes over. If you’re not here and use Task schedule, the recording will happen automatically. But make sure RecMaster recorder is running in the background and you’ve set the right capture time before your leaving.
After recording, you can do easy edits with RecMaster or simply leave it on the hard drive for enjoy on someday in the future. Don’t share or transmit the content without the permission of copyright owners. If you are not sure about it, check through the platform’s terms of use and copyright law of your country.

Sunday, December 29, 2019

How Do I Screen Record on My Windows 7 Computer?

In the past year, according to netmarketshare, Windows 7, with over 30% market share, is still the second largest platform version on the computer market (Windows 10 took >46% share). A large number of Windows users and critics even agree that this over 10-year-old system is the best OS Microsoft has ever made. No matter what reason you keep your Windows 7 and didn’t upgrade to 8 or 10, you use your computer to do the same things you need. And screen recording is just one of them. When facing Windows 7 screen recording thing, there are a few questions customers usually concern:
How do I record screen on my Windows 7?
● Is there a built-in screen capture app on Windows 7 just like the Game Bar/DVR on Windows 10?
● What’s the best screen recorder for Windows 7?
● How do I select the one suiting me most?
If you have one or more questions of those listed above, plead go ahead this to find the best ever answers we can give in this post.
To begin with, we have to tell you that Windows 7 doesn’t have any hidden screen recorder like Game bar/DVR that Windows 10 has. Therefore, you have to seek dig around for third-party screen recording software for Windows 7. Here we’ve rounded 3 best ones up in view of compatibility, features and complexity, all of which are given easy-peasy guides. Hopefully you can find the one you fancy.

How to Use RecMaster to Record Windows 7 Screen

Pros: Five recording modes (incl. gameplay/audio recording), shoot and save recorded video automatically, multi-monitor capture, task scheduler, VFR/CFR, annotations
Cons: record @60fps at most, editor needs to be enhanced, not support hardware acceleration at present
Do you want to start your vlog channel with some screencasting videos? Or you just require some recorder to help capture online movie for local storage. RecMaster can meet all of your capture needs by offering five core recording modes –“Game Mode”, “Full Screen”, “Custom Area”, “Webcam”and “Audio Only”. And the last two features are what many other similar programs lack of. Now let’s take a look at how RecMaster records screen on Windows 7.
free download RecMaster for Windows
Step 1 – Download & Install
Free download the RecMaster package for Windows and finish the setup on your Win 7 machine. When you launch it, you will see a trial interface like this.
Windows 7 Screen Recorder - RecMaster
Step 2 – Choose a Recording Mode and Set for It
You are free to record full screen, a certain area/window, the webcam or audio only. Here in the demonstration screenshot, we picked Custom Area mode and planned to grab the selected area for a picture-in-picture VLC instruction.
How to Use RecMaster to Screen Record on Windows 7
We turned on the front camera, system sound and microphone, defined the output video as an MP4 @24fps (constant frame rate) at original quality. You can also click “Settings” to add watermark, adjust mouse cursor effect, customize the hotkeys and so on.
Step 3 – Record and Annotate If Necessary
Hit the red circle REC button to get recording started. During this process, you can pause/resume and stop on a small floating toolbar. Also the toolbar gives entrances to main window and drawing panel for annotation. Making real-time annotation for notable moments or interesting part is more convenient than doing it afterwards.
Floating Toolbar of RecMaster

Step 4 – Stop Recording
When the presentation s over, click stop button or use hotkeys (Alt+2 by default) to end the recording. After that, you can view, make easy edits or upload to YouTube with RecMaster.
line

How to Use Wondershare Filmora Scrn to Capture Windows 7 Screen

Pros: Full edit suite, save recording as GIF, 15-120 fps, upload video to YouTube/Vevo/Facebook/Twitch, GPU acceleration
Cons: Recordings will be added into editor automatically, webcam not appear when shooting picture-in-picture video, scheduled recording unsupported, capture only one monitor
Since Filmora Scrn is a member of Wondershare Filmora family, it’s equipped with a simple Filmora-style editor. Different from the workflow (record and export at one go) of general screen recorders, “Record -> edit -> export” is the standard of Filmora scrn. Customers who have more requirements on edits will love Filmora scrn.
Step 1 – Download and Finish the Installation
Download the official version on Filmora Scrn page, and install it by following the wizard.
Step 2 – Open and Get Started with Setup
After you launch Filmora scrn, there are three buttons located on the main UI –“Get Started” for make settings before recording, “Quick Capture” for popping up the recorder panel, and “Video Editor” for editing video at once.
Screen Recorder for Windows 7 - Wondershare Filmora scrn ui
You are suggested to click “Get Started” to set for what content to capture, video resolution/fps, encoding methods, hotkeys and whether to make use of GPU acceleration. Settings done, click “Capture” to display another small control.
Of course you can skip this and do “Quick Capture”, because you can also do the same settings afterwards.
Step 3 – Record and Load to Editor
If there’s no change after settings in Step 2, click the red button to start the recording. As you see, there’s no real-time drawing tool, because you can add various annotations later in the editor. When the capture ends, click the stop button to load recording to editor and access to the editor control.
Filmora scrn screen recorder for Windows 7
Step 4 – Edit and Export
Filmora scrn records and loads video/audio/webcam content as a single track here. You can edit and export any of them as you want. You can make your recording looks attractive by applying annotations and cursor effect. You can cut media track, change playback speed and scale the recording at your option.
Filmora scrn's Editor for Screen Recording on Windows 7
All edits completed, click the top right corner Export button to output as MP4/MOV/GIF/MP3 or upload this video to hot online sites like YouTube.

line

How to Use OBS Studio to Record Windows 7 Screen

Pros: Unlimited screens& resources to capture, audio mixer with filters, transitions between scenes, a wide range of configuration options to adjust, H.264 hardware encoding, streaming supported
Cons: No editor preloaded, black screen problems sometimes, hard for recruits to master
For more advanced recording users or those who need to do live broadcasting, free screen recorder for Windows (7-10) – OBS Studio is surely the first choice. While for the newbies, it’s probably a huge difficulty to step into the proficient crowd at a short period of time. We here will sho you an easiest instruction on how to use it on your Win 7.
Step 1 – Download and Install It on Your Windows 7
Go to OBS Studio’s official site to free download the full and secure installer of it. After finishing the installation, open it up to continue.
Step 2 – Create Scenes, Sources and Open Audio Mixer If Necessary
For an entry-level user, if the recording task is not complex like a screen tutorial, a webcam lecture, or a gamaplay fight, creating one scene is just enough. Only when your content needs to switch from one to another should you create more scenes at one time.
Below in the picture, we’ve created a scene, with four sources added: Video Capture Device for the integrated web camera, Browser 2 for the OBS official site, Windows Capture for a Microsoft word page, and a hidden Display Capture for the whole Windows 7 desktop. Apart from these four sources, you can add more as shown in the image – Audio Input/Output capture, Game Capture, Image source, VLC capture, text capture … And all of the sources are free to display or hide.
OBS Studio Resources
By default, OBS Studio accepts system sound and microphone sources. If you need to add external audio, add audio capture firstly from sources. Thus, it will show in the audio mixer list.
Step 3 – Settings
By clicking “Settings” on the right bottom UI, you will see a comprehensive settings control, among which “Output”, “Video” and “Audio” are most commonly used ones. You can set recording format, encoder, frame/bit rate, quality, recording path, audio track number and more like these items from three options. You can also explore the rest recording settings if you are so curious like a cat (won’t be killed, lol).
OBS Studio Settings for Windows 7 Screen Recording
Step 4 – Start and Stop Recording
Tap “Start Recording” to begin the shooting. When your guide/lecture/movie goes over, click “Stop Recording” to end it. OBS Studio will not show you in the folder, so you have to navigate to the saving folder to check the capture. For postproduction, open-source video editor is your ideal option. Audacity, OpenShot and LightWorks are our top recommendations.
These three are our picks of best screen recorder software for your Windows 7, from entry- to pro-level, free to paid. You can try either or all measure which one is more appropriate for your skill and requirement.

Thursday, December 26, 2019

How to Screen Record on Your Windows Laptop

Nowadays, people take more time with their laptops rather than the desktop computers, because the laptops, on one side, are more convenient, on the other side, with the hardware upgrading, are gradually becoming more powerful tools than before, so that users can use them to do the same things as desktop computers do. 
How to Screen Record Laptop with RecMaster
Then when it comes to screen recording on the laptop, since there are so many screen recorder software for laptop on the market, you may get a headache on how to choose the best one. Below in this post you will find something useful.

An All-in-one Laptop Screen Recording Program Is What You Need
Let's begin with how to judge and choose the one that suits you most?
● Firstly, check its supported systems and hardware requirements (if there is) to make sure it's compatible with your laptop
● Secondly, check whether the software has features you need. For example, 
  • whether it supports recording a specific area
  • if there’s an option to enable the system sound, microphone or webcam (for picture-in-picture effect)
  • whether there's an annotation toolbar to draw or mark during screencasting
  • do you need the task scheduler feature for auto future recording
  • do you need to do easy edits with the recorder...

● The last thing is, of course, the complexity level of the software operation. Software with a complicated and unclean interface is not recommended for those newbies.

How to Screen Record on Windows Based Laptop from HP/Dell/Lenovo/Asus/Acer etc.

Here we set RecMaster – a simple yet versatile screen recorder – capturing laptop screen as a demonstration. You can work on any kind of recording out with it by following this guide. 
Now please free download it on your laptop and finish the setup.
Step 1 – Plan Your Recording Type or Find the Recording Source
If you are going to make an instructive tutorial on a certain program (gameplay included), close all of the irrelevant tasks on your laptop and check the app’s performance in advance to ensure a smooth recording. If you plan to capture an online video, open the page and set a proper resolution to standby. If necessary, do test the system sound, microphone, and webcam in case some error occurs when using them during recording.
Laptop Screen Recorder - RecMaster
Step 2 – Choose Related Recording Mode on RecMaster
Open up RecMaster on your computer. There are multiple recording modes located on the main interface – “Game Mode” (for Windows laptop only), “Full Screen”, “Custom Area”, “Webcam” and “Audio Only”. You should select one recording mode according to your actual needs. Note that there’s no Game Mode for Mac version RecMaster currently, you can alternatively use full screen or custom area instead.
Each video recording mode enables you to edit output format, video quality, frame rate, as well as the mouse cursor and watermark effects. As to the display of webcam, whether to turn on or off the system audio and microphone, it totally depends on your requirement.
If your target recording content is a live streaming event, you are free to set the task scheduler to start the capture on time automatically. Thus you don’t have to wait in front of the laptop.
RecMaster Custom Screen Record
Step 3 – Start Recording and Do Annotation (Optional)
Tap the red circle REC button when you get ready to begin the recording. During the recording process, you can perform pause/start and end behaviors on the floating toolbar (enabled under Settings -> General -> Floating toolbar) or by using hotkeys. Below is the default hotkeys, which are changeable under Settings -> Hotkeys:
Start/Pause: Alt + 1 | End recording: Alt + 2 | Show main window: Alt + 3 | Hide/Show webcam: Alt +4
For those who need to annotate some content, the annotation tool on the floating toolbar is the facility to turn to.
Step 4 – End Recording
Click the red square on the floating toolbar or red round on the main window when you’ve finished the recording. Then a recording list window will pop up, delivering you the video information and allowing you to rename, play, edit, delete or upload the laptop screen recording to YouTube, Google Drive.
For video postproduction, RecMaster’s built-in editor only features cutting unwanted video parts off. If you need more video edits like adding effects, you are suggested get another editor expert. And many open source experts are worth a try such as Lightworks and VSDC Free Video Editor.

Wrapping Up on Recording Laptop Screen

Creating your own video channel is much easier than starting a personal site. And taking screen recording with an existing laptop or computer is the most convenient way to start your video journey, no extra cost at all. For most online courses, they are also the outcomes of a laptop plus a recorder program. For video collectors, recording is the only workaround when it comes to any un-downloadable or inconvertible video. Hopefully this guide is helpful for recording your laptop screen (with audio).