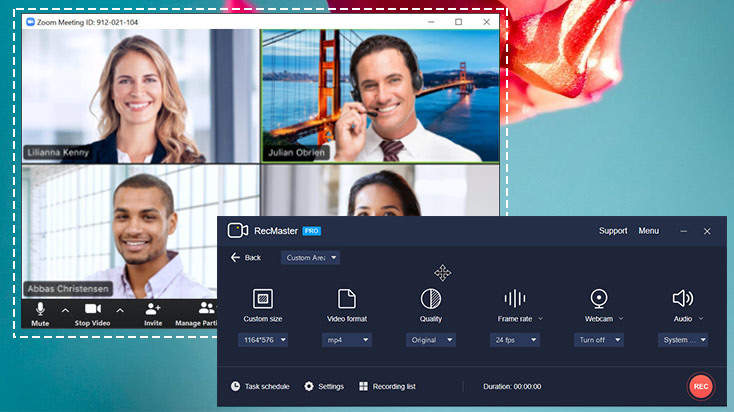
Great moments should be recorded for further usage or taste. Then how to record Zoom meeting or call on computer? Briefly you have two ways to go: use the built-in recording feature or leverage a third-party Zoom recorder. You may ask which is more suitable for you, well, it really depends. Please go through the following content before you make the final wise decision.
Limitations of Zoom App Recording
Everything on the planet has its pros and cons, therefore when you take Zoom recording with its bundled feature, there are something you’d better make clear in advance.
- Since any meeting includes two characters, host and attendee, the host is surely born with more powers to decide whether to allow the meeting recording, whether to give each single attendee the privilege to record, and the capability to auto-record. In other words, the participants may be limited to create Zoom recording.
- For local recording, only PC users could enjoy the benefit, which means if you are using Zoom on mobile, you are forced to turn to cloud recording or any standalone recording app. When conducting local recording on desktop, you’d better keep the file location on local drive but not to a cloud syncing folder from external places, because some converting or saving error may appear during cloud syncing.
- For paid users, Zoom enables cloud recording automatically, so take a note on the available cloud storage. If the recorded file exceeds the maximum size, only after you pay for the piece of video or audio can you obtain and watch it.
- Another risk of Zoom recording is that if the meeting is suddenly ended for internet or whatever reason, the recording on the going will be corrupted and unable to recovery.
Zoom App Recording vs Third-Party Recording, What’ s the Difference?
They two recording methods both have their own strengths and weaknesses. Below are some typical differences.It’s undisputable that Zoom is an excellent teleconferencing service which is stocked with handy and optional recording functionality. But as the information that’s moved from official sites hints, recording or file converting failure is still possible for local recording. To guarantee a more stable recording with no fall, you are suggested to invest an advanced subscriber with sufficient cloud space or employ a reliable Zoom screen recorder.
|
Zoom’s Built-in Recorder
|
Third-party Zoom Meeting Recorder
|
|
|
Recording
Permission
|
The
hosts are free to record while the attendees may be prohibited to record.
|
Anyone
joining the meeting could take a screencast.
|
|
Recording
Modes
|
Free
users can only enjoy local recording while licensed people are offered both
local and cloud recording modes.
|
Only
supports local recording
|
|
Recording
Length
|
No
limit for local recording while it’s restricted by the cloud storage.
|
No
time limit.
|
|
Recording
Formats
|
MP4
for video recording, M4A for audio recording and M3U for playlist playback.
|
More
available video and audio formats, which vary from programs.
|
|
Recording
Quality
|
All
files are produced with fixed quality level.
|
More
flexible quality control.
|
|
Recording
Stability
|
Any
unexpected shutting down of meeting or file conversion will result in a
corrupted or non-recoverable recording.
|
What’s
going on in the Zoom app will not affect the software recording.
|
|
Others
|
Able
to record audio files for any participants who speaks separately and has the
recording transcribed; Public behavior that everyone knows you’re recording;
|
Usually
has features of annotating, editing, schedule recording and one-click sharing; Recording secretly.
|
How to Record Zoom Meeting or Call with Third-party Recorder?
Generally, a dedicated screen recorder is capable of capturing whatever contents and behaviors on the desktop, system audio and microphone sound included. Set RecMaster – one of the easiest desktop screen recorders – for example, it’s able to perfectly record online meeting, video/voice call, and webinar from Zoom, Google Hangouts, Skype or so. Also, you are free to create video or audio recording according to the real situation. Have a glance at the simple tutorial below:
Step 1. Free download and install the recorder on to your computer.
Step 2. Launch RecMaster and choose a proper recording mode to move on: Full Screen is recommended for capture full-screen meeting, Custom Area is to meet the requirements on windowed or a fixed area recording, and Audio Only is designed for shooting Zoom meeting or call audio purely.

Step 3. Set file format, quality and turn on the microphone. If you will hold or attend a scheduled meeting or prefer a scheduled recording, click Task Schedule to define the time and enable it.
Step 4. Click REC button or press Alt+1 hotkeys to start to record Zoom meeting/call once it’s ready. For scheduling recording, you just keep RecMaster running in the background and leave it alone. It will automate the capture by itself.
Step 5. When the recording is over, you are empowered to do easy edits and sharing it to YouTube directly.
No comments:
Post a Comment