Wednesday, July 22, 2020

How to judge the security of a screen recorder?

How to judge the security of a screen recorder?

Normally, most of the screen recorders, especially those top-ranked, are reliable to use on your mobile or computer. However, to help you ensure the safety of each screen recorder by yourself, here several tips and tricks are shared to help you obtain a totally safe screen recorder and pleasant screen recording experience.
1. Download or use the screen recorder from secure website.
Official site is the recommended place to get a screen recorder’s installer. While if the site is marked by browser as an insecure one in its address bar, don’t download or use anything from this site in case you are infected with unknown threatening stuff.
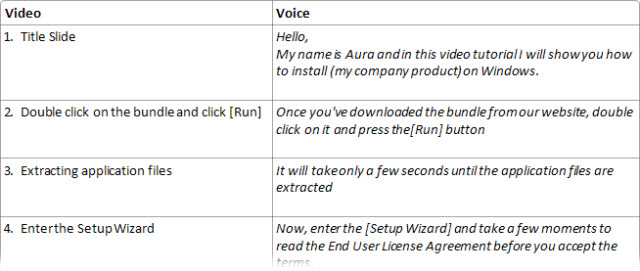
2. Mind whether there’s any bundled software when installing any desktop screen recorder.
Not all bundled tools are harmful to PC, because some may be the outcome of brand cooperation. However, as the “most popular” spreading way of malicious/ad/spy software, you still need to put more focuses on that. Uncheck the installation of such attached app or take some time to search to know it exactly.
3. Pay attention to if there’s any security prompt from anti-virus program.
Anyway, you pick and set the screen recorder up on your desktop. In general, your antivirus will scan and give you security identification on the installing package and process. If there’s nothing special, congratulation, you can start up any capture at will. While if there’s red warning, you are suggested to stop and quite this utility.
4. Keep an eye on the popup ads.
Either from the online site or desktop interface, automatic popup ads are annoying. This kinds of sudden appearance may also have you infected with unknown virus if you click or initiate other thing with them. So thinks twice before doing so.
5. Cloud or local storage, broadly speaking, owns the similar security level.
Many take cloud storage solution a less safe way to hold crucial business recording for its shared server and invisibility, however, with the reliable cloud service, you can save the recorded file as safely as keeping it to local server. Since no one is typically superior to the other one, simply choose the more convenient and proper one according to your file type and budget.

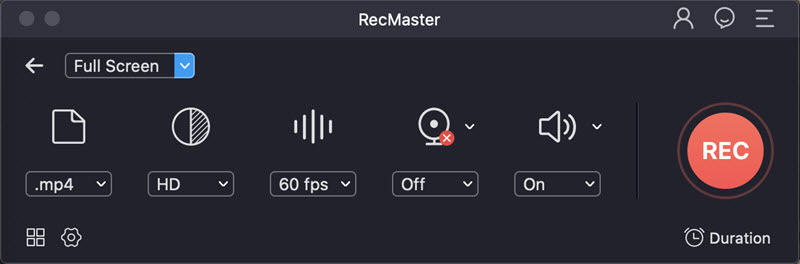
Some Safe Screen Recorders for Windows and Mac
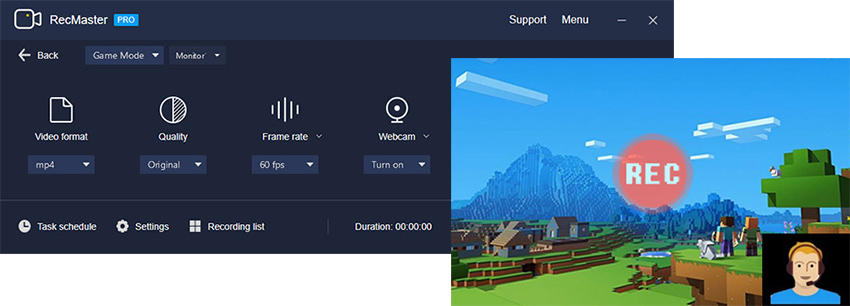
RecMaster
OBS Studio
Bandicam
Movavi Screen Recorder
screencast-o-matic
Screencastify
Loom
filmora scrn

Tuesday, June 16, 2020

How to Record Video Tutorial on Computer [Easiest Way]

Keeping hearing an idea that video is the future of content marketing. Who recognizes the age of video has already arrived! Video is not only a smash hit among business and work, but also enjoyed greatly by teachers, students, (YouTube) vloggers and general public for personal usage. If you happen to be one of them and want to record video tutorial to showcase product demo, impart knowledge, instruct a how-to, or share something new, let’s get together to walk through the whole process below.

How to Make Tutorial Video with Screen Recorder and Editor

Producing video tutorial is not such difficult, because nowadays there are a number of handy and slick screen recorder and editor programs that could help you achieve the goal perfectly. Of course, pure screen capture software with no editing features is able to create high-quality screencast as well. The only shortcoming is that when you want to do some basic edits, you have to search for and download another video editor to continue the work. That’s to say, screen recorder with internal video editor is superior to that who doesn’t bundle editor.
Without further ado, now, please take a look at how RecMaster – the easiest screen recorder for tutorial – makes tutorial recording on Windows 10 PC.

1. Free download and install RecMaster

RecMaster now supports both Windows and Mac systems. If your machine is Windows XP, 7, 8 or 10 based one, or is running any among macOS 10.11-10.15 versions, obtain the related installing file below and set it up on your computer.

2. Get the recording content ready

This is an essential step, because as a rule, most experienced video producers make a plan and write down detailed script before the real capture. The purpose of these behaviors is to make the final tutorial well-constructed and eye-catching for viewers from start to end. If you care your audiences, take time to do it.
● Tips on planning
Great content is half the success. So you are suggested to investigate, address the specific customer and decide what tutorial theme or main idea to record. If possible, communicate with potential viewers to explore their expectations, adopt & arrange them, and ensure your upcoming recording, at least the main part, is to their tastes.
You can write a brief outline covering tutorial title, main parts, rough duration of each part and so on. Aiming to help you always get the point during recording, plan staff is worth a try. Drawing blackboard is also an available way to visualize recording beforehand.
● Tips on script
To captive people and make them believe in your words, telling the “story” naturally, funny and keeping it as simple as possible. But don’t be a statement machine. If the on-screen movements could speak for themselves well, why not nourish the visual activity with more educational or convictive narration.
Script is regarded as the most important portion of plan, which contributes to a more effective video tutorial. Two- or more-column video script showing video scenes, audio, annotation and more is an excellent choice. You can find many practical script templates online of training tutorial, video lesson, demo or other types. Below is an example picked online.
Script template for video tutorial
● Practice really matters
Practice makes perfect. An impressive and user-friendly video must be super smooth on both screen activity and external narration, with no lag capture, no “eh.. eh..” mur-mur or embarassing standstill to get the audience sidetracked. Therefore, be patience to practice until you level yourself up at an expected flow. It’ll be better if you can find someone to listen to your practice and are not niggard to give you unbiased advice.

3. Start the Tutorial Recording

After having all things prepared, it’s your show time!
Open up RecMaster on desktop and choose a proper recording mode as necessary. In most cases, Full Screen is the top choice for entire display capture. Custom Area is also picked by many to avoid leakage of any private things on PC. For Windows users, Game Mode is also a good mode for DirectX game capture.
Free RecMaster
RecMaster, as one of the best and the easiest screen recorder for computer, is equipped with many key features. Here after defining video format (MP4 or so), quality level (original high quality at most), frame rate (up to 60fps), webcam and audio source on the secondary window, and maybe also mouse cursor effect and watermark on Settings panel, you can begin the capture immediately by pressing the REC button or typing Alt + 1 hotkeys.
Full screen recording settings
Please note: In order to gain a lag-free video tutorial, you’d better end all of the unnecessary tasks on desktop.
Also, the audio source includes system sound and microphone. The former one refers to the sound coming from sound card and the latter option means voice from any external (plugged) mic. Set an example here: if you plan to record video tutorial with real-time background music (played on PC) and narration (spoken via mic), turn the two audio options on at the same time.

4. Add Voice over, Webcam, Annotation etc.

As long as you’ve turned the microphone on, go on your voice with the ready-made script on what’s happening on the screen. During the recording process, you are free to pause & resume (with Alt + 1 hotkeys) for repeat or annotation, show or hide webcam for picture-in-picture effect (with Alt + 4), and show main window (with Alt + 3) for more settings. And all of those key combinations are changeable under Settings.
In some cases, you must need the annotation tool to highlight or explain something. Do access the floating bar panel and click the pen icon to pop it up, then take the advantage of a dozen of objects such as brush, rectangle, circle, line, arrow  to mark, text to note, pen highlight etc. You can tweak the thickness and color of shapes, font size of text as you like.
Annotation tool of RecMaster
NOTE: Only when the “Hide panel when recording” option under Settings -> General -> Floating toolbar is unchecked will you see the floating bar during tutorial recording.

5. Stop It

When you have finished recording video tutorial, end it by clicking Red button or type Alt + 2. After that, the tutorial clip will be listed in a recording list with default date-&-time-formated name, duration, file size and more.

6. Edit and Upload

In case there are mistakes or unwanted segments, RecMaster is embedded with an editor to help you cut the extra parts off by cutting & merging.
cut video
Now, you can share this finished tutorial video to your YouTube channel by simply clicking the UPLOAD icon and pick YouTube as the target social site. Also, you can back it up to Google Drive here.
upload to YouTube from recording list
Other feature you may need: Scheduled recording, Webcam recording, Audio only recording

Monday, May 25, 2020

4 Tools to Record Hulu (Live) TV

– Live TV streaming only lives for once, and for some contents you want to view more than one time or you don’t have time to sit in front of the monitor to watch, you need to do recording.
– Sometimes when you go for a travel or holiday, you want to pass time with Hulu TVs on the airplane or other wireless places, and at this time, you need to record them in advance for offline playback.
– Also for those non-live video-on-demand videos, once your subscription goes to an end, you can’t access and play those you haven’t finished any more.
So here we give several tools to record Hulu Live TV or  general subscribed  video-on-demand video at will.
1. Hulu’s Cloud DVR
Hulu gives its Live TV subscribers a Cloud DVR service to record any TV shows, movies, and other live events for playback. So you don’t have to worry about missing what you love for various reasons, just add the right name(s) to “My Stuff” to record. But the default free storage is only 50-hour. Once it reaches the full capacity, new recording will replace the older according to the time order.
Cloud DVR of Hulu app
You can choose to upgrade the storage to 200 hours by paying a $9.99 montly fee for Enhanced Cloud DVR Add-on, with which you can also enjoy extra ability to fast forward through recording ads.
2. Third-party DVR Streaming Recorder like Audials
You can also hire dedicated streaming DRM remover and recorder software like that from Audials, PlayOn etc. This kind of streaming recorder is able to access & remove DRM and record any movies, TVs and matches so that you can open them at will regardless of the playback devices.
Audials record hulu streaming
3. VCR or DVD Recorder
VCR and DVD recorders seem a little bit old-fashioned, but they work quite well on Hulu content recording. Once your set-box DVR keeps shows locally, you can output them from DVR and input them into VCR/DVD machine with related cable.
4. Screen Recorder like RecMaster plus DRM Crack Tool
Widevine DRM is the copy protection tech that Hulu as well as many other streaming giants adopt in their subscribed media. As one of the less secure DRM implement, L3 carries low-quality video and audio data and is not hard to decrypt. In the past 2019, a security researcher has cracked it successfully. After decrypting Hulu video with third-party tool like WidevineCDM, you can watch and record any Hulu-locked content with RecMaster screen recorder for unrestricted playback in clicks. For ad-included videos, you’d better pause and resume the recording to skip the ad forward. And for upcoming Live show, you can create and enable a scheduled task to auto-start the capture at time.
record Hulu with screen recorder

Friday, May 15, 2020

How to Capture Screen Video with Nvidia Share/Shadowplay

Nvidia has its own screen recording tool to help its graphics card owner capture game video effectively, and that’s exactly the Nvidia Share, previously known as ShadowPlay. It's a bundled utility of Geforce Experience, a companion application for Nvidia GPU users to update driver, improve gaming performance and share screen. Specifically, the Nvidia Share has 2 core features regarding screencasting: Instant Replay and Record.


What’s the difference between instant replay and record? 

–  Instant Replay automatically records gameplay in the background, and whenever you have some moments to save like killstream, you should  press hotkey to save the last 5-min (adjustable) game video locally. If you don't save it, the cache recording will be discarded and replaced by later data.
–  Record of Nvidia Share is a manually recording mode. Only when you make it happen, it starts the real-time recording and hardware-accelerated encoding. You also need to give it to an end manually. 

Nvidia Video Capture Supported PC, Games, Settings..

● System requirement of Geforce Experience Share: Windows 7/8/10 with Nvidia GTX 600 series card or higher (More details)
● Geforce Experience and Share supported games: DirectX 9/10/11-based games. Note that OpenGL games are only supported at windowed mode. (Supported games)
● Video Formats: H.264 MP4
● Instant Replay length: 0.25 – 20 minutes
● Manual recording length:
For Windows 7, it’s limited to 4GB (about 20 minutes depending on quality settings).
For Windows 8 or later, there’s no time limit as long as the free disk space is enough.
● Capture quality: Low, Medium, and High. Customization is also available.
● Resolution: up to 1440p HD
● Frame rate: up to 60fps
● Bit rate: 10 – 50 Mbps

How to Use Nvidia Screen Recorder to Capture Screen Video

This is how Nvidia screen recorder works on your computer:
Step 1. Enable Nvidia Share
Surely, the premise of a normal Nvidia recorder usage is that its Share feature is enabled. Check and enable it under Settings -> General -> Share.
Step 2. Choose the Recording Mode
As mentioned above, Share has two capture modes – Instant Replay and manual Record. You decide which is more suitable for you according to your actual requirement.
Two Modes of Nvidia share
Step 3 – Set for Recording
The settings may include that listed Nvidia Video Capture Settings in the previous part like video quality, length, resolution, fps and bitrate, and some others like audio source/volume, recording saving path, HUD layout contents (camera, FPS conter etc.) and position.
Another thing you should to know is that Nvidia Share supports both windowed and full desktop capture. To conduct an entire desk recording, you should open up Privacy control panel under Settings and toggle the Desktop capture option to the green-background “On” status.
Step 4 – Start and End Recording
Everything prepared well, run your PC game and go ahead the capture in its own way. Below are some hotkey concerning Nvidia recording:
Alt+Shift+F10: Turn on or off the Instant Replay
Alt + F10: Save the last x minutes recorded when Instant Replay is on.
Alt + F9: Toggle manual recording on or off. Save the manual recorded video.
After the recording, you can directly upload the clip onto social media platforms on the overlay.

Limits of Nvidia Screen Recorder

☛ GeForce Experience is born with advantages on game recording thanks to the hardware accelerated processing and less performance penalty (about 5-10%). However, if your GeForce video card of desktop or notebook is not competent for that, say GTX 500 series or lower, you will lose the chance to enjoy GeForce Experience screen recorder.
☛ Then since GeForce Experience is a multifunctional program which is designed for updating graphics driver, optimizing gaming performance, as well as screen capturing and live broadcasting, it puts more efforts on feature balance and basic game capture, missing some settings or functions that many common dedicated screen recorder will embed, for instance, non-game recording, recording formats, edit suites, and scheduled recording.
☛ At last, as we’ve shown above, Windows 7 users can simply document around 20-min game fight and couldn’t benefit from the unlimited manual recording like Windows 8 and 10 hosts.

How to Record Gameplay or Other Screen Content at will?

If you are up a creek of either of these circumstances, you will have to turn to some best Nvidia screen recorder alternative like RecMaster. RecMaster is an easy yet feature-laden screen recording software program. With it, you can capture any DirectX game or non-game video with audio on desktop at your perfered size, format and quality. Multiple-monitor capture, automatic capture, webcam overlay, voice narration, in-game annotating, defined watermark, bundled video editor and one-click sharing are all here to ensure a happy customized journey. Now let’s take a look at how it works on computer. You are suggested to free download it here and set it up on your machine.

How to Screen Record Game or Non-game Video with RecMaster on PC/Mac

Step 1 – Prepare Content and Choose a Recording Mode
Depending on the recording content, you should select one recording mode once you launch RecMaster.
Main UI of RecMaster
Game Mode is a Windows-only feature that’s especially developed for PC gamer. Something like Nvidia’s manual recording, it helps you keep the whole gameplay walkthrough or some crucial segments as 1080p HD/4K@60FPS MP4.
Full Screen is to grab the whole display video.
Custom Area is used for any certain region recording, maybe an app, a browser tab, or something else.
Webcam simply records and outputs camera video of integrated or external front cam.
Audio Only serves as an audio recorder for maintaining any online ratio, music, podcast and so on.
In most cases, Game Mode is the go-to option for game capture, and Full Screen & Custom Area for general non-game recording. Nevertheless, if your PC game doesn’t cooperate with Game Mode, switching recording mode is a reliable workaround.
Step 2 – Do Settings
For video capture, you can adjust video format (MP4/AVI/FLV), define a quality level and frame rate value. Also, you can mix webcam overlay, system sound and voiceover from mic. If you want to achieve more watermark and cursor effects, go to Settings panel to do so,
Record game with RecMaster
For auto-capture, please open up Schedule task control, fix the start & end time, and then don’t forget to enable the task.
Step 3 – Record and Stop
Pressing the red buttons to start and stop the recording. During the process, the mini floating bar gives you access to annotation too. After the recording, the recording list offers entrances to editor and social share.
RecMaster Hotkeys:
Start/Pause recording: Alt+1
End recording: Alt+2
Show main window: Alt+3
Hide/Show webcam: Alt+4

Friday, May 8, 2020

QuickTime Player Screen Recording with Audio: Just Follow this Guide

The simplest way to capture Mac screen is to utilize the macOS-bundled tool – QiuckTime. This versatile media player, similar to top-notch VLC, provides screen recording feature to meet the potential video capture needs. With it, you can select any specific region or the whole desktop to record, with audio coming from mic or not. Internal system sound cannot be grabbed due to the copyright and piracy issue. However this is a workaround…

How to Use QuickTime Player to Record Mac Screen

The workflow of QuickTime screen recording is quite easy and you can follow the steps below:
Step 1: Open up QuickTime, navigate to File menu on the top toolbar and click “New Screen Recording”.
Step 2: The related screen recording prompt will pop up. For macOS Mojave or Catalina users, a brand-new Screencast app shows up (which can also be called out by pressing Shift-Command-5). While for earlier system users, it’s the QuickTime-style “Screen Recording” control.
Two Screen Recording Control of QuickTime
Step 3: Define the target recording area through ready-made options (shown below) and mouse. Then set the Microphone source, Save to path, Timer, and others like whether to Show Mouse Clicks or not during recording.
Earlier Screen Recording panel works a little bit different. By clicking the down arrow, you are only given Microphone and Options. Recording region selection is available after tapping the record button.
Step 3: Start and end QuickTime screen recording. Note that the stop button is located in the menu bar.
Step 4: Utilize the thumbnail to trim, save, or share.
Save QuickTime recording video
Many users get troubled in stopping the QuickTime capture, like they don’t know “how to stop QuickTime screen recording” or the “stop button on menu bar can’t stop recording” exactly. In view of this, you are suggested to try button and shortcut methods back and forth. Below are some shortcut details for QuickTime screen recording on macOS 10.15 & 10.14.
ActionShortcut
New screen recordingControl-Command-N
Open Screenshot appShift-Command-5
Capture the entire screenShift-Command-3
Capture a portion of the screenPress Shift-Command-4 to select
Capture a window or the menu barPress Shift-Command-4 -> Space bar to choose with camera pointer
Capture a menu and menu itemsPress Shift-Command-4 to choose the menu item with pointer once you opened the menu.
Capture the Touch BarShift-Command-6.
Stop the RecordingCommand-Control-Esc
QuickTime offers no way to grab sound from system and built-in apps like QuickTime itself, Skype, WhatsApp, Zoom, Facebook, and YouTube, then how to walk this through? Just keep your patience to move on.

How to Record Mac Screen with Internal Audio?

The screen audio recording limitation of QuickTime paves the way for both third-party virtual audio driver and Mac screen recorder with audio. In other words, you have 2 ways to achieve a regular screen recording with internal audio.
Way 1 – Use QuickTime Plus Third-party Audio Driver
Once you install any kernel extension like Soundflower, the extension will route audio from any app to another. Thus, QuickTime is empowered to grab app sound. There are also many Soundflower-alike virtual audio drivers, such as Blackhole and Loopback.
Quicktime plus soundflower to record screen with audio
Way 2 – User Third-party Mac Screen and Audio Recorder
Standalone desktop screen recording software comes in handy and is the most recommended way to make screencast. For one thing, screen recorder is more powerful than amateurish QuickTime screen recording by offering more flexible settings and effects. For another, without seeking for any third-party driver setup, the program itself is able to handle audio capture perfectly. Here we take how RecMaster works as the demonstration.
RecMaster is an easy but slick screen recorder with intuitive interface. It supports any kinds of screen video recordings like game capture, entire screen capture, certain app capture, a fixed area capture, webcam capture and pure audio capture. To help create more engaged and eye-catching footage, RecMaster enables you to superimpose front camera face into screen at any position and size for explanation, to show and highlight mouse cursor for demos, as well as make annotations for instructions. Now please download and install it on your Mac machine for easier screen recording.
free download RecMaster for Mac
Steps on how RecMaster records:
Step 1. Prepare your capture content and open RecMaster for Mac
Step 2. Choose the right mode. When heading over to the secondary window, check and alter the presets if it’s necessary. You are free to customize video format, quality, frame rate, webcam mix, audio source and recording length.
RecMaster - QuickTime Alternative to Record Mac Screen with Audio
Step 3. Click record button to make the capture happen. Note that the annotation feature will come to RecMaster for Mac soon.
Step 4. Stop the recording. Then play and do easy edits.

Tuesday, April 21, 2020

What should you do if your screen recording has no sound?

Solve Mac or Windows Screen Recording Has No Sound
Few words can’t make it clear why computer screencasts come out with no sound, because the possible reasons are diversified. You may forget to turn on or increase the volume of speaker or microphone. The audio driver may be out of date. There is some software conflict that prevents your current recording tool to access the audio source. Or the tool itself has no right to rip the audio from audio card. QuickTime screen recording has no sound is a typical example.
In view of this, you’d better firstly check your audio devices and system settings to ensure your recording app are allowed to use (microphone) sound. Then close all of the other background useless applications, and update or reinstall the audio driver. If possible, equipping your robot with a more quality screen and audio recorder like RecMaster to be responsible for the screen capture is quite recommended.
In general, a screen recording expert makes every screencasting requirement a handy. So does RecMaster, who are able to grab and encoding all the screen activities with audio into H264 MP4 HD, or a pure audio file. Multiple monitors are also supported for gaming or working related capture. Let’s see how it works on Windows or macOS. Now you can get it downloaded and installed on your desktop or laptop.
Step 1 – Open RecMaster and prepare the content you may need to record, e.g. Powerpoint presentation, online streaming, PC game, conversation application and so on.
Step 2 – Choose a mode and do settings.
RecMaster gives multiple options for users to choose. Specifically, from game mode (Mac version will add this mode soon), full screen, custom area, webcam to audio only, you should pick the one according to your actual capture source and size.
Settings you are empowered to adjust are various, including file format, video quality, frame rate, webcam overlay, system sound and microphone source and volume, mouse cursor effect, watermark, hotkeys and output file destination.
RecMaster Settings for Sound
Windows version has an extra “task schedule” feature to create any on-time capture automatically.You can check out jow to schedule a recording on computer.
Step 3 – Record screen with sound as you prefer.
Based on the settings, RecMaster will initiate a recording in your own way once you hit the REC button. During the recording time, annotating is available. And after the recording, software offers easy editor and YouTube-sharing entrance.

Solve Screen Recording on iOS  Has No Sound
Many iPhoners come up with such silent recording matter when they use internal recorder to capture streaming from YouTube, iTunes, Instagram, facecam, Facebook, WhatsAppp, safari or other places.
● To walk this annoying error through, you should firstly ensure you’ve done the right operateion. When you add and access the Screen Recording in Control Center, do turn on the Microphone Audio button to allow recording with both micphone voice and system/app sound. Turning this option off means capturing iPhone’s internal sound only. If you close Microphone Audio and ringer together, you will get a muted recording in the end.
● Still voiceless? Then you can try resetting all the settings of your phone to original or restoring your gadget with iTunes backup. If your phone doesn’t running the latest iOS (13), maybe it’s time to update your iOS.
● There are also cases that it’s the DRM copy protection that restrains your audio capture. At this time, you will have no way to record but simply enjoying the video or music with your subscription.
● If your target is not copy protected content and you still fail to record the sound after completing the methods mentioned above, there’s another simple workaround – mirror your iPhone screen to PC and then conduct the capture. Below are the steps.
Mirror iPhone to Computer and Then Record with Audio
Step 1 – Use adaptuer plus HDMI combination, Wifi or USB + mirror software to move your iOS screen to compture. The workflow of the former one is to plug Apple’s Digital AV adapter into the charging port of iPhone, and then use HDMI to connect it with PC monitor. Note that VGA adatpter is not recommended for the connection because it’s unable to carry audio signals. To wirelessly mirror iPhone to PC, you need a dedicated helper like Let’sView.
Step 2 – Open up the mirrored monitor and get a screen recorder ready on the computer. If the mirror software has screen recording feature, then take advantage of it. If not, use computer’s internal screen recording tool, say Game bar (for Windows 10 only) and QuickTime. Since they are not so flexible as standalone screen recorder, you can switch to RecMaster and take advantage of this iPhone screen recorder for computer here. 
Step 3 – Start up your iPhone activity and enable the screen recorder to work in your way.
Step 4 – Stop and edit if necessary.