Sunday, December 29, 2019

How Do I Screen Record on My Windows 7 Computer?

In the past year, according to netmarketshare, Windows 7, with over 30% market share, is still the second largest platform version on the computer market (Windows 10 took >46% share). A large number of Windows users and critics even agree that this over 10-year-old system is the best OS Microsoft has ever made. No matter what reason you keep your Windows 7 and didn’t upgrade to 8 or 10, you use your computer to do the same things you need. And screen recording is just one of them. When facing Windows 7 screen recording thing, there are a few questions customers usually concern:
How do I record screen on my Windows 7?
● Is there a built-in screen capture app on Windows 7 just like the Game Bar/DVR on Windows 10?
● What’s the best screen recorder for Windows 7?
● How do I select the one suiting me most?
If you have one or more questions of those listed above, plead go ahead this to find the best ever answers we can give in this post.
To begin with, we have to tell you that Windows 7 doesn’t have any hidden screen recorder like Game bar/DVR that Windows 10 has. Therefore, you have to seek dig around for third-party screen recording software for Windows 7. Here we’ve rounded 3 best ones up in view of compatibility, features and complexity, all of which are given easy-peasy guides. Hopefully you can find the one you fancy.

How to Use RecMaster to Record Windows 7 Screen

Pros: Five recording modes (incl. gameplay/audio recording), shoot and save recorded video automatically, multi-monitor capture, task scheduler, VFR/CFR, annotations
Cons: record @60fps at most, editor needs to be enhanced, not support hardware acceleration at present
Do you want to start your vlog channel with some screencasting videos? Or you just require some recorder to help capture online movie for local storage. RecMaster can meet all of your capture needs by offering five core recording modes –“Game Mode”, “Full Screen”, “Custom Area”, “Webcam”and “Audio Only”. And the last two features are what many other similar programs lack of. Now let’s take a look at how RecMaster records screen on Windows 7.
free download RecMaster for Windows
Step 1 – Download & Install
Free download the RecMaster package for Windows and finish the setup on your Win 7 machine. When you launch it, you will see a trial interface like this.
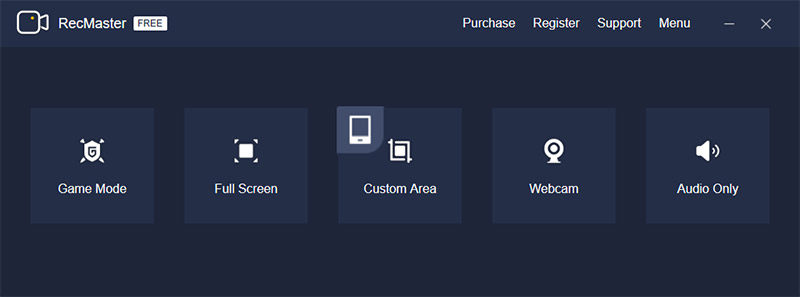
Windows 7 Screen Recorder - RecMaster
Step 2 – Choose a Recording Mode and Set for It
You are free to record full screen, a certain area/window, the webcam or audio only. Here in the demonstration screenshot, we picked Custom Area mode and planned to grab the selected area for a picture-in-picture VLC instruction.
How to Use RecMaster to Screen Record on Windows 7
We turned on the front camera, system sound and microphone, defined the output video as an MP4 @24fps (constant frame rate) at original quality. You can also click “Settings” to add watermark, adjust mouse cursor effect, customize the hotkeys and so on.
Step 3 – Record and Annotate If Necessary
Hit the red circle REC button to get recording started. During this process, you can pause/resume and stop on a small floating toolbar. Also the toolbar gives entrances to main window and drawing panel for annotation. Making real-time annotation for notable moments or interesting part is more convenient than doing it afterwards.
Floating Toolbar of RecMaster

Step 4 – Stop Recording
When the presentation s over, click stop button or use hotkeys (Alt+2 by default) to end the recording. After that, you can view, make easy edits or upload to YouTube with RecMaster.
line

How to Use Wondershare Filmora Scrn to Capture Windows 7 Screen

Pros: Full edit suite, save recording as GIF, 15-120 fps, upload video to YouTube/Vevo/Facebook/Twitch, GPU acceleration
Cons: Recordings will be added into editor automatically, webcam not appear when shooting picture-in-picture video, scheduled recording unsupported, capture only one monitor
Since Filmora Scrn is a member of Wondershare Filmora family, it’s equipped with a simple Filmora-style editor. Different from the workflow (record and export at one go) of general screen recorders, “Record -> edit -> export” is the standard of Filmora scrn. Customers who have more requirements on edits will love Filmora scrn.
Step 1 – Download and Finish the Installation
Download the official version on Filmora Scrn page, and install it by following the wizard.
Step 2 – Open and Get Started with Setup
After you launch Filmora scrn, there are three buttons located on the main UI –“Get Started” for make settings before recording, “Quick Capture” for popping up the recorder panel, and “Video Editor” for editing video at once.
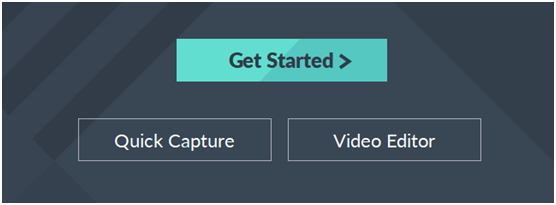
Screen Recorder for Windows 7 - Wondershare Filmora scrn ui
You are suggested to click “Get Started” to set for what content to capture, video resolution/fps, encoding methods, hotkeys and whether to make use of GPU acceleration. Settings done, click “Capture” to display another small control.
Of course you can skip this and do “Quick Capture”, because you can also do the same settings afterwards.
Step 3 – Record and Load to Editor
If there’s no change after settings in Step 2, click the red button to start the recording. As you see, there’s no real-time drawing tool, because you can add various annotations later in the editor. When the capture ends, click the stop button to load recording to editor and access to the editor control.
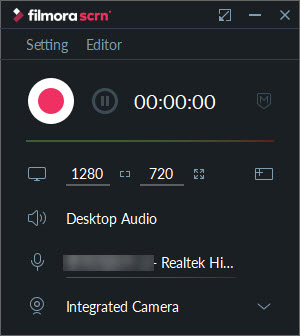
Filmora scrn screen recorder for Windows 7
Step 4 – Edit and Export
Filmora scrn records and loads video/audio/webcam content as a single track here. You can edit and export any of them as you want. You can make your recording looks attractive by applying annotations and cursor effect. You can cut media track, change playback speed and scale the recording at your option.
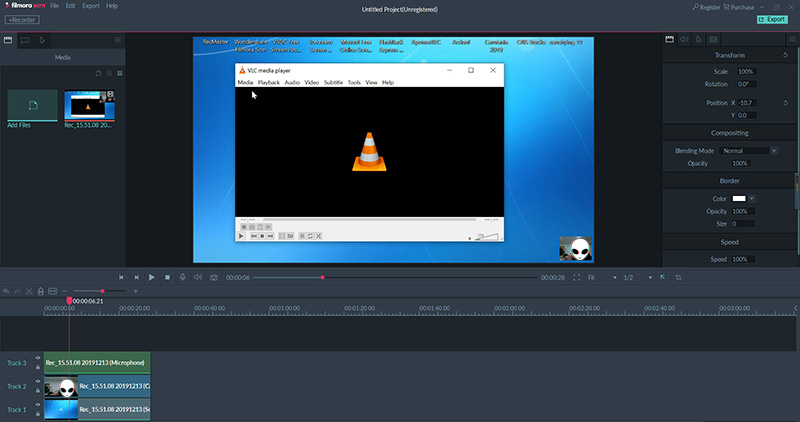
Filmora scrn's Editor for Screen Recording on Windows 7
All edits completed, click the top right corner Export button to output as MP4/MOV/GIF/MP3 or upload this video to hot online sites like YouTube.

line

How to Use OBS Studio to Record Windows 7 Screen

Pros: Unlimited screens& resources to capture, audio mixer with filters, transitions between scenes, a wide range of configuration options to adjust, H.264 hardware encoding, streaming supported
Cons: No editor preloaded, black screen problems sometimes, hard for recruits to master
For more advanced recording users or those who need to do live broadcasting, free screen recorder for Windows (7-10) – OBS Studio is surely the first choice. While for the newbies, it’s probably a huge difficulty to step into the proficient crowd at a short period of time. We here will sho you an easiest instruction on how to use it on your Win 7.
Step 1 – Download and Install It on Your Windows 7
Go to OBS Studio’s official site to free download the full and secure installer of it. After finishing the installation, open it up to continue.
Step 2 – Create Scenes, Sources and Open Audio Mixer If Necessary
For an entry-level user, if the recording task is not complex like a screen tutorial, a webcam lecture, or a gamaplay fight, creating one scene is just enough. Only when your content needs to switch from one to another should you create more scenes at one time.
Below in the picture, we’ve created a scene, with four sources added: Video Capture Device for the integrated web camera, Browser 2 for the OBS official site, Windows Capture for a Microsoft word page, and a hidden Display Capture for the whole Windows 7 desktop. Apart from these four sources, you can add more as shown in the image – Audio Input/Output capture, Game Capture, Image source, VLC capture, text capture … And all of the sources are free to display or hide.
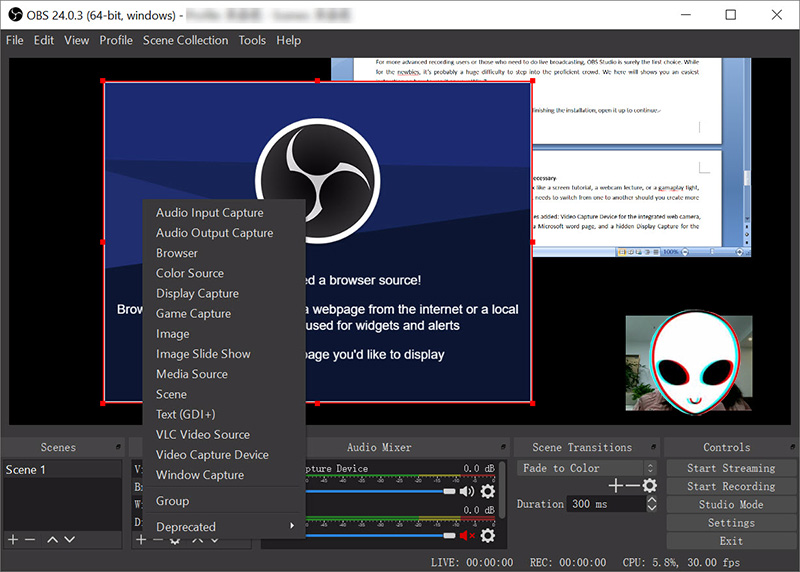
OBS Studio Resources
By default, OBS Studio accepts system sound and microphone sources. If you need to add external audio, add audio capture firstly from sources. Thus, it will show in the audio mixer list.
Step 3 – Settings
By clicking “Settings” on the right bottom UI, you will see a comprehensive settings control, among which “Output”, “Video” and “Audio” are most commonly used ones. You can set recording format, encoder, frame/bit rate, quality, recording path, audio track number and more like these items from three options. You can also explore the rest recording settings if you are so curious like a cat (won’t be killed, lol).
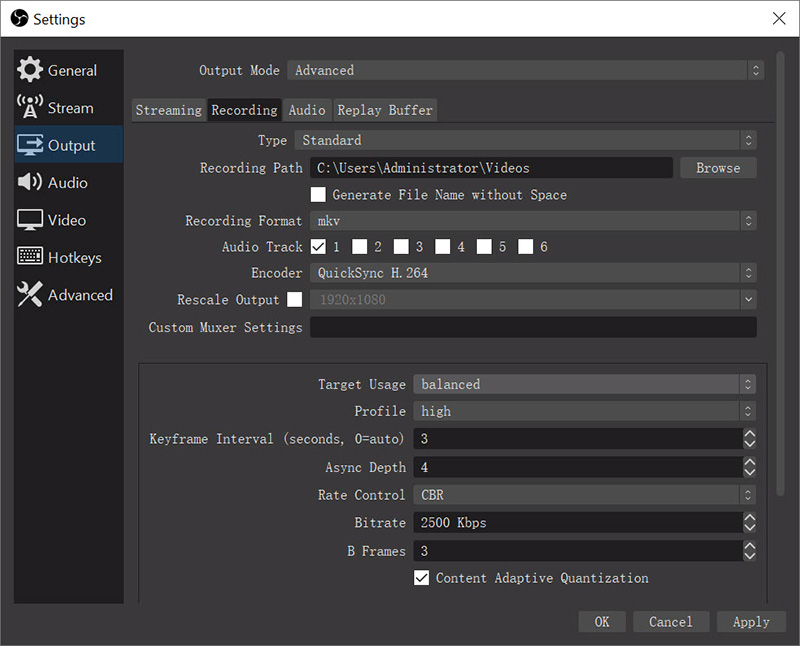
OBS Studio Settings for Windows 7 Screen Recording
Step 4 – Start and Stop Recording
Tap “Start Recording” to begin the shooting. When your guide/lecture/movie goes over, click “Stop Recording” to end it. OBS Studio will not show you in the folder, so you have to navigate to the saving folder to check the capture. For postproduction, open-source video editor is your ideal option. Audacity, OpenShot and LightWorks are our top recommendations.
These three are our picks of best screen recorder software for your Windows 7, from entry- to pro-level, free to paid. You can try either or all measure which one is more appropriate for your skill and requirement.

Thursday, December 26, 2019

How to Screen Record on Your Windows Laptop

Nowadays, people take more time with their laptops rather than the desktop computers, because the laptops, on one side, are more convenient, on the other side, with the hardware upgrading, are gradually becoming more powerful tools than before, so that users can use them to do the same things as desktop computers do. 
How to Screen Record Laptop with RecMaster
Then when it comes to screen recording on the laptop, since there are so many screen recorder software for laptop on the market, you may get a headache on how to choose the best one. Below in this post you will find something useful.

An All-in-one Laptop Screen Recording Program Is What You Need
Let's begin with how to judge and choose the one that suits you most?
● Firstly, check its supported systems and hardware requirements (if there is) to make sure it's compatible with your laptop
● Secondly, check whether the software has features you need. For example, 
  • whether it supports recording a specific area
  • if there’s an option to enable the system sound, microphone or webcam (for picture-in-picture effect)
  • whether there's an annotation toolbar to draw or mark during screencasting
  • do you need the task scheduler feature for auto future recording
  • do you need to do easy edits with the recorder...

● The last thing is, of course, the complexity level of the software operation. Software with a complicated and unclean interface is not recommended for those newbies.

How to Screen Record on Windows Based Laptop from HP/Dell/Lenovo/Asus/Acer etc.

Here we set RecMaster – a simple yet versatile screen recorder – capturing laptop screen as a demonstration. You can work on any kind of recording out with it by following this guide. 
Now please free download it on your laptop and finish the setup.
Step 1 – Plan Your Recording Type or Find the Recording Source
If you are going to make an instructive tutorial on a certain program (gameplay included), close all of the irrelevant tasks on your laptop and check the app’s performance in advance to ensure a smooth recording. If you plan to capture an online video, open the page and set a proper resolution to standby. If necessary, do test the system sound, microphone, and webcam in case some error occurs when using them during recording.
Laptop Screen Recorder - RecMaster
Step 2 – Choose Related Recording Mode on RecMaster
Open up RecMaster on your computer. There are multiple recording modes located on the main interface – “Game Mode” (for Windows laptop only), “Full Screen”, “Custom Area”, “Webcam” and “Audio Only”. You should select one recording mode according to your actual needs. Note that there’s no Game Mode for Mac version RecMaster currently, you can alternatively use full screen or custom area instead.
Each video recording mode enables you to edit output format, video quality, frame rate, as well as the mouse cursor and watermark effects. As to the display of webcam, whether to turn on or off the system audio and microphone, it totally depends on your requirement.
If your target recording content is a live streaming event, you are free to set the task scheduler to start the capture on time automatically. Thus you don’t have to wait in front of the laptop.
RecMaster Custom Screen Record
Step 3 – Start Recording and Do Annotation (Optional)
Tap the red circle REC button when you get ready to begin the recording. During the recording process, you can perform pause/start and end behaviors on the floating toolbar (enabled under Settings -> General -> Floating toolbar) or by using hotkeys. Below is the default hotkeys, which are changeable under Settings -> Hotkeys:
Start/Pause: Alt + 1 | End recording: Alt + 2 | Show main window: Alt + 3 | Hide/Show webcam: Alt +4
For those who need to annotate some content, the annotation tool on the floating toolbar is the facility to turn to.
Step 4 – End Recording
Click the red square on the floating toolbar or red round on the main window when you’ve finished the recording. Then a recording list window will pop up, delivering you the video information and allowing you to rename, play, edit, delete or upload the laptop screen recording to YouTube, Google Drive.
For video postproduction, RecMaster’s built-in editor only features cutting unwanted video parts off. If you need more video edits like adding effects, you are suggested get another editor expert. And many open source experts are worth a try such as Lightworks and VSDC Free Video Editor.

Wrapping Up on Recording Laptop Screen

Creating your own video channel is much easier than starting a personal site. And taking screen recording with an existing laptop or computer is the most convenient way to start your video journey, no extra cost at all. For most online courses, they are also the outcomes of a laptop plus a recorder program. For video collectors, recording is the only workaround when it comes to any un-downloadable or inconvertible video. Hopefully this guide is helpful for recording your laptop screen (with audio).

Monday, December 23, 2019

[2020] Best 5 Screen Recorder Software for PC/Mac


You are just a beginner and searching for some suitable screen recorder software to record your Windows or Mac screen, but not so knowledgeable about this tech stuff… We here picked top 5 programs out. Hopefully you can find a favored one to get your recording work started immediately.

Screen Recording Is Not So Difficult As You Think
Maybe you’re an educator who wants to record some teaching resources for students?
A blog/YouTube starter who’d like to create and upload some instruction clips online?
A game boy or girl willing to capture some gameplay moments for sharing to gaming friends?
Or just a business newbie to promote your product with some basic how-to-use guides or bla bla bla?

If you happen to be a video aficionado and need to make some screen recordings with your computer running Windows or Mac, the 5 best screen recorder software for desktop listed in this post can help you do whatever screen capture with clicks. To give you a hand on finding most suitable one fast, we will pay more attention to the feature differences and mark the complexity level of each for your reference. Hope you can select the right one according to your budget and goals.
Well, before we start the journey together, you are suggested to think over several basic questions that may affect your final decision:

l  What operation system are you using?
l  What kind of recording do you need to do? A full-screen capture, a windowed one, or just a webcam one?
l  What kind of software do you prefer, free or paid? If it’s the paid one, what’s your budget?
l  Do you need to record audio from system or microphone?
l  Is annotation necessary during the recording? Or you need to do some easy edits with the recorder?
l  What video format do you wish to record?
l  If you prefer to upload the recording video online instantly with a click?
l  Whether the cloud recording is necessary to save space?
l  Do you need to do live streaming?

If you have the answers to these questions in your mind, let’s begin to check the top list one by one.

1.       OBS Studio – The One That Stands out from Large Free Open Sources
Keywords: Free, no time limit/watermark, live stream + screen record, multi-platform, beginners need take time to master
Complexity: ★★★★☆
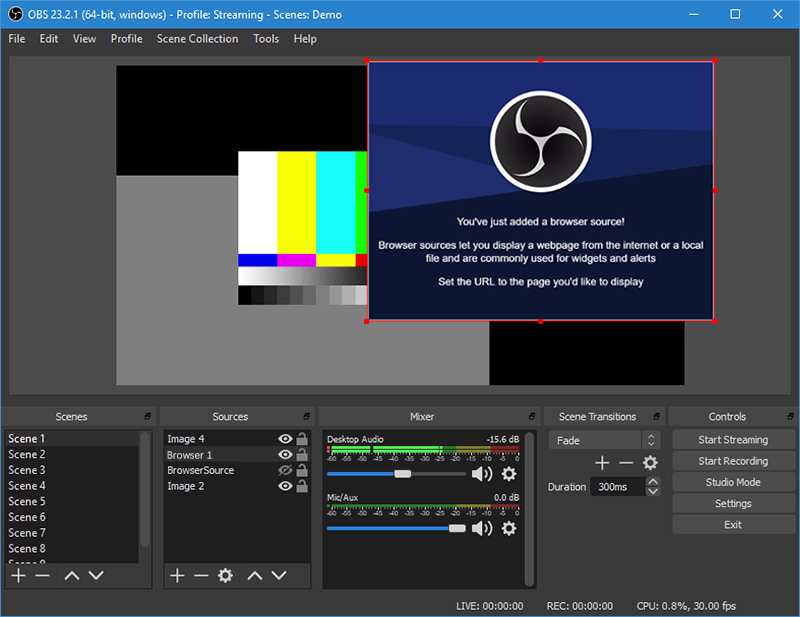
It is no exaggeration to say that OBS Studio is the most powerful freeware for living broadcasting & screen recording. That’s why many giant sponsors and backers are delivering contribution to it, twitch, NVIDIA GEFORCE RTX, Logitech, Xsplit, just to name a few.
Why it’s so welcomed? On one hand, it’s packed with many features and options that give end users high customization of recording content and how to display them with overlays. On the other hand, OBS makes it possible to broadcast video directly to all mainstream streaming services like Twitch, YouTube gaming, Facebook Live, Twitter Periscope, Mixer and Restream.io FTL/RTMP.


As a versant screen recorder for Windows, Mac, as well as Linux, OBS Studio is able to capture screen from different sources like (full-screen or specific) Display, Window, Browser, Game, Media, Video Capture (webcam) Device, VLC, Image Slide Show and similar. The built-in “Audio Mixer” makes it easy to add system or microphone sound into recording video as one or multiple tracks. Moreover, it allows users to remux recordings after the shooting, which saves much time for users to re-convert the final capture with another video converter.
Where this is OBS Studio users, there is “learning curve” which they are used to mentioning. That’s because OBS does offer many advanced setting options for output video/audio, hotkeys and streaming covering format (multi-track MKV/MP4 is concluded), bit rate, quality, encoder and CPU usage (for streaming).

In one word, OBS Studio may be a little complicated for novice. But once the one has conquered the steep learning curve and gets an ultimate understanding on its workflow and elaborate settings, pro-level screen recording is just at his or her fingertips.

OBS Studio Overview
OS
Windows 7/8/8.1/10; macOS 10.11+; Linux
Type
Free open-sourced software with excellent recording & streaming feature
Time limit/Watermark
N
Full Display / Window Capture
Y
Game Capture
Y
Webcam Capture
Y
Image Capture
Y
Mix System Sound/Mic
Y (support outputing multi-track MKV/MP4 file)
Scheduled Recording
N
Record multiple monitors at once
Y
Audio Recording Only
Y
Annotation / Built-in Editor
N (But support converting output file from one format to another)
Video (encoder)
MKV, MP4, FLV, MOV, TS, M2U8 (software X.264, hardware QSV)
Hotkeys
Y
One-click upload to online sites
N

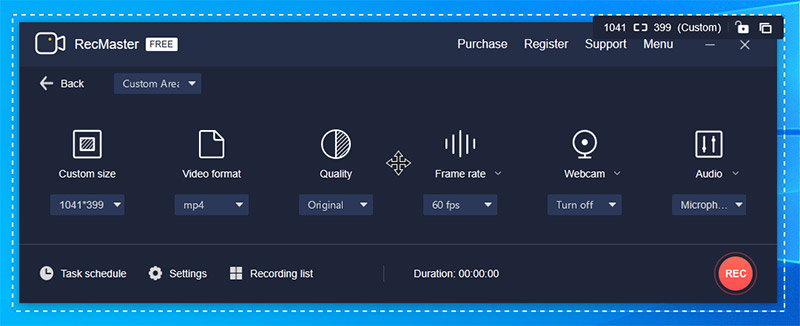
2.       RecMaster – An Excellent Screen Recorder for Both Beginner and Advanced Users
Keywords: Cross-platform software, full or custom screen recording, vertical recording for mobile, multiple-monitor recording, record audio/webcam only, built-in annotation tool & editor
Complexity: ★★☆☆☆

RecMaster is one of the typical commercial screen recording entities for desktop. Similar to popular Movavi Screen Recorder, ApowerREC and Wondershare Filmora Scrn, it supports grabbing whatever activities happening on the desktop at will – choosing the whole or a specific region to record, enabling the computer or any microphone sound, overlaying the integrated or external camera picture or not, doing some annotation work with brush or sticker tools, and using recording scheduler to start the capture at a certain time.

As to output video settings, RecMaster gives mainstream MP4, FLV and AVI three format options to choose, enables users to record high-quality 1080p or even 4K video at up to 60 fps (if the monitor is a 4K one). Variable frame rate or constant frame rate is also optional to choose for balancing the video quality and file size. If the output is a little bit long, it’s free to cut and merge with the internal editor. Better than other programs, it features recording dual monitors at once as long as you select them all before the recording.

RecMaster Overview
OS
Windows XP/7/8/8.1/10; macOS 10.7+
Type
Commercial software and free trial allows 2-min recording
Price
Lifetime license at $49.95 for 2 PCs/Macs;
1 year license at $29.95 for 10 PC/Mac
Full Display / Window Capture
Y
Game Capture
Y
Webcam Capture
Y
Mix System Sound/Mic
Y
Scheduled Recording
Y
Record multiple monitors at once
Y
Audio Recording Only
Y
Mouse Effects / Countdown
Y
Annotation / Built-in Editor
Y
Video Format & Settings
MP4, FLV, AVI ( with frame rate and quality level adjustable)
Hotkeys
Y
One-click upload to online sites
Y
Image Capture
N

3.       Ezvid – An Easy and Free Screen Recorder with Its Own Style
Keywords: Free, no watermark, synthesize speech, write title/desc, preloaded music, 45-min limit at a strench, no Mac version
Complexity: ★★★☆☆

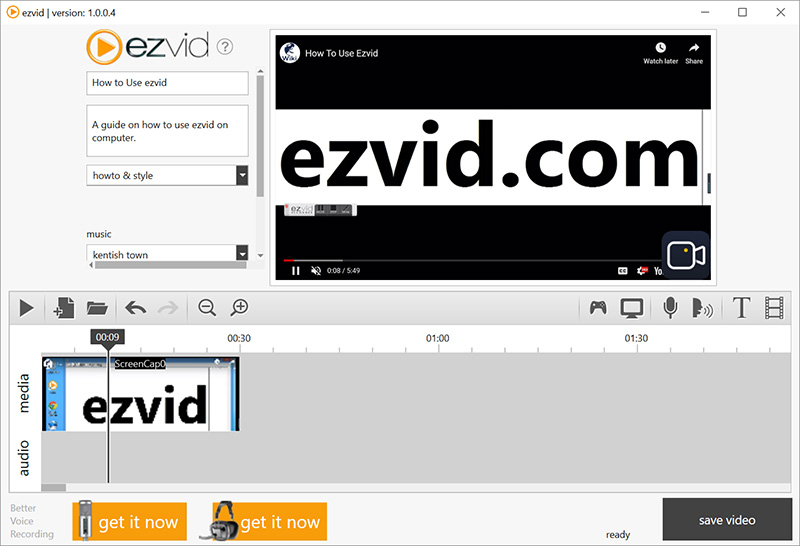
Ezvid is handy freeware empowering users to capture on-screen actions at up to 45 minutes one time with sound/voice, background music or front camera video. Once the software is launched, you can see some of its features located on the straightforward interface, among which the ability to define video information (title, description and video category included), add existing background music and synthesize speed are Ezvid-style functionalities. Other advanced screen capture options such as Microphone Capture, Select Capture Area and Webcam Capture can only be set by clicking featureless “capture screen” button shaped in a PC icon -> use advanced settings. Ezvid allows users to draw annotations and add sticker during recording, too. After the recording, it’s also free to add watermark, intro/outro text and external video into the project line, control the video playback speed of each clip.

However, there’s no way to adjust output media location, file format or size, because the software has fixed the video file to (VC-1) WMV at 23.976fps, the audio stream to WMA, and the file saving path in This PC -> Documents -> ezvid, all of which are unavailable to alter. Also, there’s no hotkey operation. Sometimes it’s only a black screen when capturing a gameplay segment, and the official troubleshooting tip is to run game in windowed mode.

Ezvid Overview
OS
Windows XP3, 7, 8, and 10
Type
Time limit
Y to some degree (45 minutes at a stretch)
Full or Custom Recording
Y
Gameplay Recording
Y
Webcam Recording
Y
Mix System Sound/Mic
Y
Scheduled Recording
N
Record multiple monitors at once
N
Audio Recording Only
N
Built-in Editor
Y
Video
WMV (VC-1)
Hotkeys
N
Capture Image
N

4.       BandiCam – An Awsome Screen Recorder to Capture Desktop and External Devices
Keywords: Device recording, output AVI/MP4 at up to 144fps, for Windows only
Complexity: ★★★☆☆

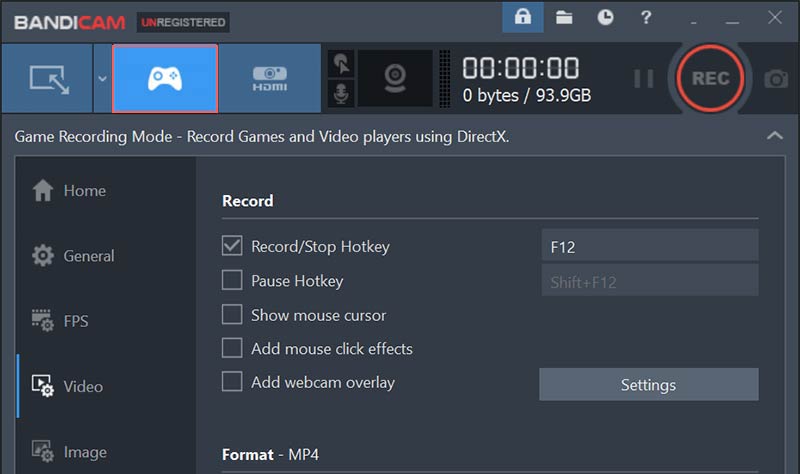
BandiCam is another commercial program that’s able to screen record anything on the screen seamlessly. As the description above hints, the main difference between BandiCam and other software is that it allows users to do external device recording. Specifically, with a capture card here and an external device connected to PC via MHL/HDMI cable, for instance iPhone, Android, Xbox/PS and IPTV/Apple TV, you can record its screen with BandiCam easily.

BandiCam is able to customize video recording by adding (chroma key) webcam overlay, mixing system/microphone voice, outlining screen, adjusting rich video and audio parameters, even some presets are ready-made like HEVC/H.264 60fps (Intel QSV) video, 1080p YouTube/Twitter video, and PowerPoint video. Unfortunately, it’s only available for Windows PC, and if you need to capture more than one monitor at the same time, you must copy and paste the software folder and run two BandiCam instances simultaneously, not so convenient.

BandiCam Overview
OS
Windows XP, Vista, 7/8/10 (Support for 32/64-bit)
Type
Commercial software and free trial allows 10-min recording
Price
Lifetime purchase at $39 for 1 PC, $59 for 2 PC, $137 for 5 PC, $254 for 10 PC…
Full or Custom Recording
Y
Gameplay Recording
Y
Webcam Recording
Y
Mix System Sound/Mic
Y
Scheduled Recording
Y
Record multiple monitors at once
N
Audio Recording Only
N
Built-in Editor
N
Video Format
AVI, MP4
Video Codec
HEVC/H.264 (Inted QSV), H.264, MPEG4 For MP4;
H.264 (Inted QSV), H.264, Xvid, MPEG1 etc. for AVI
Capture Image
Y

5.       ScreenApp.io – A Browser-based and Real Online Screen Recorder Without Downloads
Keywords: Instant recording on full desktop or specific window, No installer downloads, Chrome/Firefox/Opera only, Internet connection required
Complexity: ★☆☆☆☆

Online screen recorders are scattering here and there. Known by you or not, browser tools like online video downloaders, converters and editors help users do related work 100% on the web, without downloading any installer or launcher. You probably think you can use those web screen recorders to record in the same way without download. Well, it’s just a game of luck. 95% online screen recorders are not “true online tools”, because they can only work when an external installer or launcher is downloaded and installed beforehand. Movavi Free Online Screen Recorder, Apowersoft Online Screen Recorder, ShowMore web recorder all works in the same way.

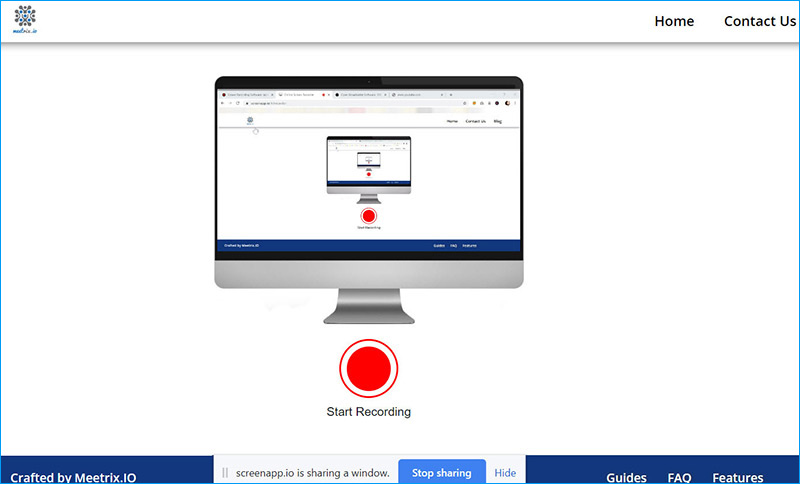
ScreenApp.io, a 100% free online screen recorder without downloading setup package or extension, is a model worker. But compared to desktop software, it’s less functional for it can only take the screen video of the whole screen, a certain application window or a browser tab at an unchangeable video format (VP8 WebM here), with microphone/browser audio or not. Once you stop the recording, you need to manually download the capture file stored in the cloud. However, every coin has two sides, you can share the moment to social or friends with only an URL.

ScreenApp.io Online Screen Recorder Overview
OS
Any OS running Firefox, Chrome or Opera browser
Type
Freeware
Full or Custom Recording
Y (Unavailable to custom the region manually)
Gameplay Recording
Y
Webcam Recording
N
Sound sources to mix
Only Browser or Microphone audio
Scheduled Recording
N
Record multiple monitors at once
N
Audio Recording Only
N
Built-in Editor
N
Video Format
WebM (VP8)
Video Settings
N
Capture Image
N

The Final Words
Speaking of the most important life-altering creations in the last 30 years, Internet is undoubtedly the top spot. Thanks to the advent of Internet, more and more things become possible and easier. How could the people living in 20th century imagine that they can show themselves and connect with the whole world with just a phone or a computer near in the future! Video, as one of the modern and pop media formats nowadays, explains things more clearly and delivers better consumer engagement than text and image. When you have plan to screencast a teaching video, operation instruction, live streaming, game sessions, slides video, webcam video or any other, a handy screen recording software can work it out.

In short, the five best screen recorder picks listed above can meet all general screen recording needs. We can’t tell anyone to be the best of all for beginner, because either has its pros and cons of different degree. So our advice is – you figure your recording purpose and requirements out first and then choose the most appropriate one or two programs to put your hand to video production as a green hand. When you make yourself master of basic recording skills with these tools, you can move on to some advanced and expensive software like Adobe Presenter and Camtasia.